

Every visitor to Bulgaria should go to Rila Monastery. As the country’s most visited attraction and a cultural icon which used to feature on the 1 lev note, you’d think that the Monastery would be overrated. In our opinion, its reputation is very much well-deserved: the detail of the central church’s exterior really has to be seen in-person!
Originally founded in the 10th century CE nestled into the Rila mountains, the Monastery is dedicated to the famous Bulgarian hermit, Ivan, who lived in a nearby cave. The complex was renovated and expanded in the subsequent years of Bulgarian royal rule, until it was largely destroyed by fire in the 19th century. Following reconstruction work in the 19th century, to when the frescos largely date, the complex also acted as a hideout for various national revolutionaries who sought to liberate Bulgaria from Ottoman rule.
Today, the Monastery is a protected site and remains an active monastery. When we visited, there were only 6 monks in residence, in the closed-off upper areas visitors can’t enter. As a result, despite being quite a popular site, the atmosphere in the complex is very peaceful and feels almost remote, with the forests and mountains in the background.
We visited for half a day, and felt that the time was just about right. That said, you can easily expand your visit if you have time, both within the Monastery complex and in nearby areas. Here’s our overview of how to get to the Monastery, what you should see inside the complex, and options for other things to do nearby.
Itinerary
Monastery Church
Duration: 30 mins–1 hour.
Price (per person): Free.
Must-see/Skippable: Must-see.
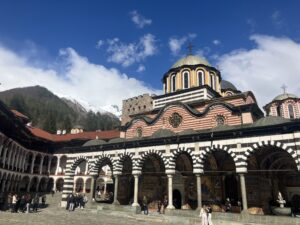
This building is really what you came to see. The Church is the famous red-and-white stripe building you’ve seen everywhere, including at the top of this itinerary and elsewhere on our site. As soon as you’ve passed through the complex’s main gate, you’ll be met immediately by the Church and its incredible frescos.
From the inside, the Church is not too remarkable. If you’ve seen a few Orthodox churches, there will be no real surprises here. That said, do look out for the various relics of Bulgarian saints on display, including the famous Ivan’s, and the tomb of Boris III, one of Bulgaria’s kings.
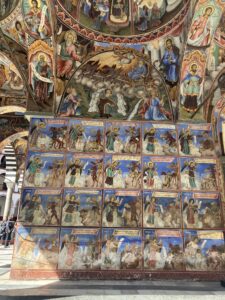
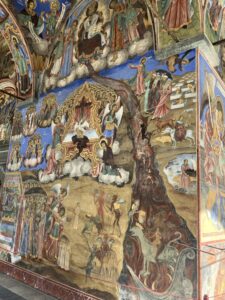
Much more interesting is the outside. In addition to five domes, the Church’s exterior is heavily decorated. The upper levels are painted in striking red and white stripes, while the lower levels and roofs feature striking frescos. It’s definitely worth spending some time taking a look at these paintings . They are really fascinating and depict not just some Biblical scenes and saints whose relics are inside the church, but also a pretty explicit depiction of Judgement Day.
However, you have to follow rules while here, written in various places in the complex. In particular, you should: cover your shoulders and knees; be relatively quiet; not enter the upstairs residential areas; and not smoke, eat, or drink anywhere inside the complex. Within the Church and other buildings, the rules are tightened: you also should not take photos, keep hands in pockets, wear hats, or touch icons and relics with your hands (you should only kiss them).
Other Monastery Buildings
Duration: 30 mins–1 hour.
Price (per person): €3.50 each, or €12 combined.
Must-see/Skippable: Skippable.
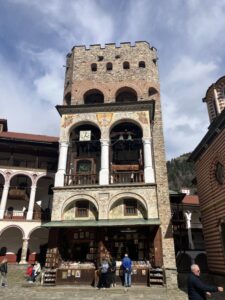
With more time, you can try out the other museums and buildings in the complex. These are: the Icon Gallery (€2.50), a collection of Orthodox church icons and monks’ portraits; Hrelo Tower (€2.50), a 14th-century tower with some historical displays; or the Ethnographic Museum (€2.50), a collection of traditional Bulgarian items. We were not as interested in the Gallery and Ethnographic Museum, especially given our limited time, and visitors could not go to the top of the Tower when we were there, so that made our decision to visit only the Church History Museum much easier.
If you do decide to go to one or more of these buildings, whether you also go to the Church History Museum, you can buy a combined ticket granting you entry into all sites.
Snacks!
Duration: 10 mins–1 hour.
Price (per person): €1–25.
Must-see/Skippable: Skippable.
Given the length of the journey between the Monastery, Sofia, and other nearby points of interest, you’ll probably want to grab some food or drink. If you planned ahead, you might have brought something with you (but remember: you can’t eat in the complex itself!) or stopped at a service station on the way. If you’re driving, our guide also recommended Magic of Rila (Магията на Рила), which is 10 minutes away from the Monastery on the way from/to Sofia and apparently serves good-value Bulgarian food.
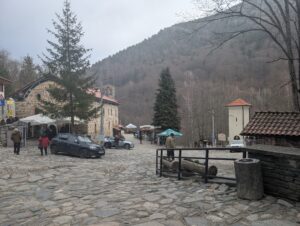
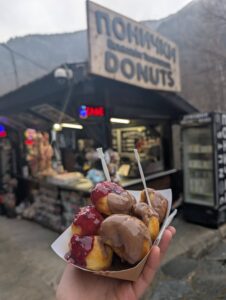
We did neither. Instead, we went behind the complex to the small food area, where you have various stalls and a restaurant (“Valyavitsa” Rila monastery, “Валявица” Рилски манастир) set against the backdrop of the Rila Mountains. Most people come for the Bakery, which serves traditional pastries and the very tasty buffalo yoghurt.
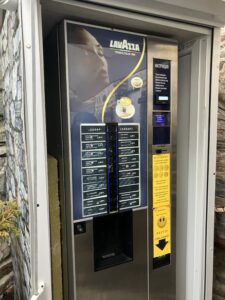
Sticky Rice had some fresh donuts while Scone had a coffee from one of the ever-present coffee machines. Both were really great, and we left very happy! Do save a bit of time to take a look around this area, as it will probably be a fairly long way to your next stop, whether Sofia, Melnik, or another place.
Want to know other things to eat and drink in Bulgaria? See our Sofia food guide!
That wraps up our short trip to the beautiful Rila Monastery. Have you been before? Did you enjoy the complex? What did you do for the rest of your day? Let us know in the comments below! We’d love to hear about what else we can do the next time we’re in the area.